Living and Dining Room: The demo and refinishing of the floors

after, Before, dining room, living room

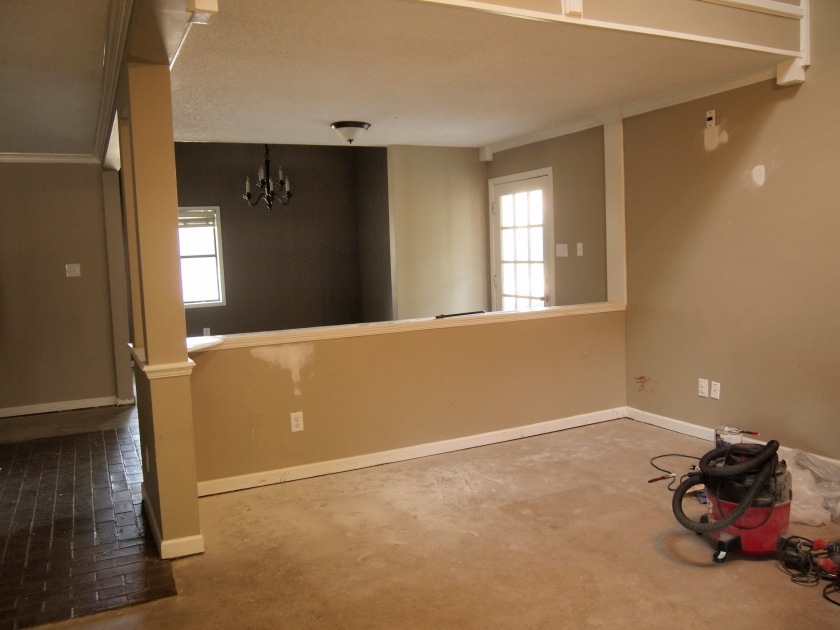
Oh the living room and dining room. These two rooms were definitely on the must fix before we move in list. We knew immediately that we would be taking out this half wall and opening up the entry way. In order to take out that wall we would also have to do a lot more just to get the rooms ready to be lived in. The carpet had to come out, the wall had to come down, the columns and wall would need to be patched, and the new flooring would have to go in. Not to mention painting to cover over the marker (which was all over the walls) and the patched holes where the previous owner had a tv mounted to the wall and multiple holes for speakers.

The above image is the area pretty much has we got it at purchase.

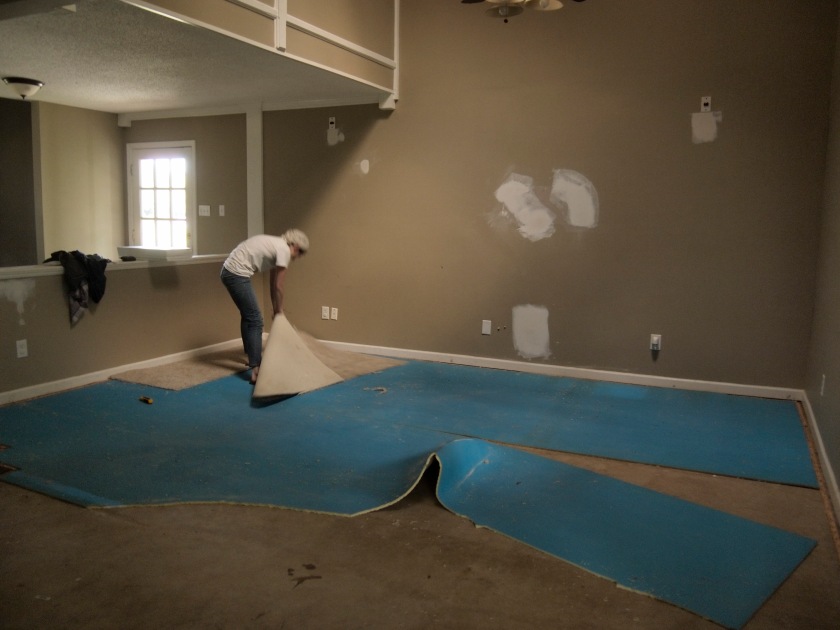
Evidence of the wall patching (side note, previous owner had the entire house and studio area wired for speakers. There were holes EVERYWHERE from either wires or speakers being pulled out. Lots of drywall patching had to be done. That was all done by the contractor we hired before closing). Everyone who has visited the house has pretty much been put to work… Even our little nephews 🙂 They had a blast helping rip up the carpet. Please note how gross the underside of the carpet is. As soon as we got the carpet out the disgusting musty smell started to quickly leave the house.

Taking the carpet out in sections so that we would be able to carry it to the truck for disposal. Thankfully my dad has a large dumpster at his work that he let us use and boy have we used it! I think total we have made at least a dozen trips to the dumpster so far while working.

Yes I was sporting a great head wrap. The great amounts of dust we were creating was settling in my hair and hats give me headaches after a couple hours. So a 1950s head wrap it was. Actually at this point I did not care what I looked like. We were working 15 hour days at the house and looking great wasn’t high priority 🙂

Carpet out of the living room and prepping the half wall for demo. My dad is an electrical engineer so we had him come out and cut out the electrical lines that were running to the outlets. The wall had three outlets and we wanted to make sure we secured the electrical line properly before sealing it up in the wall that was staying. We cut power to that area of the house, cut the line off at the wall, sealed the wire with electrical tape and wire nuts, and shoved it back in the wall. Originally we thought we would go ahead and put another outlet in the full wall where the half wall was coming off but that would put two outlets within two feet of each other so we decided to just close the wire up in the wall.

And demo time on the half wall. After pulling off the dry wall we expected to see studs and a simple framing. Ha this house said nope I’ve got another surprise. The half wall had cedar siding covering the studs. Normally you would just use a reciprocating saw to cut the stud framing out and take the unit out in one piece… Since there was cedar siding covering the studs, we couldn’t do that. We had to pull the siding off both sides of the wall in order to get to the framing, basically doubling how long it would take. Oh well. We also discovered that behind the drywall on the main walls is, can you guess, yes cedar siding. Not really sure why you would want cedar siding inside your house but we have it. Thankfully it is covered in drywall and we don’t have to acknowledge its presence 🙂

Finally down to the studs and ready for cut out. We created a huge mess! So glad this was done before move in!

Taking out the wall left an exposed spot on the main wall and the columns were down to studs where the wall had been. Joy of the wall patch… the wall by the door framing was about 2 inches further back than the right side. So we would have to build up the left side to match the right so the finishing board would be flush.

So you might ask, what is the gray gunk. Well that is concrete patching. For the flooring in the living and dining room we originally thought we would do stained concrete. We loved the look of it, the price, and the easy of actually staining the concrete. We also loved hardwood and thought about doing that for flooring as well. Actually truth be told, the entire month between signing our contract and closing we debated on what to do with the floors. We loved both stained concrete and hardwood and really couldn’t pick which we wanted to do. Eventually stained concrete won and mainly for budget reasons.

Then the half wall came out and with it chunks of concrete from the screws holding the studs in place… We knew we would have some patching to do from the carpet tack strips but we didn’t expect the larger chunks from the wall. Much research told us to use the concrete patch that comes in caulk form. Well it wouldn’t set. As in days went by and it was still liquid. So that meant we couldn’t do stained concrete. Secretly Philip and I both were glad that our hand was forced and we had to do hardwood. We both were nervous about staining the concrete and it turning out terrible and having to live with it for a while. So we turned toward the hardwood route. We have both put down different types of wood flooring but never glue down hardwood like we would pick. Boy was that an adventure…

Philip prepping the edge of the brick for the wood.

Both rooms prepped for hardwood. We must have swept and Shop Vaced the areas at least half a dozen times. There was so much dust and junk on the floors from the carpet pads.

And our wood nicely boxed up. We actually had a little bit of an ordeal getting the wood. Since we decided last minute to go the hardwood route we literally left the house mid project and went looking for wood that was in stock and ready for pick up that day. We had a really tight schedule for getting the floors done before move in and we didn’t want to wait till after move in to get the wood and install it. So ended up at Lumber Liquidators. Thankfully Memphis as one of their stores and they had what we were looking for in stock. We knew we wanted real, solid wood, hardwood and we wanted it really dark. They had that and it was in our budget. Well, it became in our budget when I told the guy I wanted a specific one he had in stock but it was a little out of my budget and we would probably had to order a different one. Apparently since it was the end of the month and they need to get in store inventory out of the store he worked with me and got the flooring to fit into our budget. I’m not really one to negotiate on prices (since I own my own business and I know that prices are set for a reason with overhead and taxes and all that fun business stuff) and when I mentioned that it was out of the budget I was doing so to just move on to the next step of getting something in budget… That said, if they were willing to come down that easily I was going to jump on it. Moral of the story, if you are looking for hardwood flooring go at the end of the month and look for what they have in stock; they will be wanting to move the product.

Also I must give a warning, make sure you double and triple check the boxes when getting them. We were picking up the wood ourselves and taking it away in our Jeep so we should have paid really close attention as we put it in. We check that the wood was right but we didn’t check the width of the boards. The flooring we got came in two widths and we purchased the narrower width. The employee brought out the pallet of boxes after a quick check we started loading it up. We were more worried about getting it all in out Jeep that we didn’t look at the width size. Come to find out they gave us the wrong size. They didn’t realize their error until we had gotten the wood back home and completely unloaded from the Jeep. So we had to load the wood back up, take it to the store, unload, reload the right stuff, and unload at the house again. It was a total of 23 boxes and the total load weighed 1300 pounds… so we moved 1300 pounds 6 times within 4 hours. We were aching so bad the next day! Check your boxes before loading!!

Philip and my brother-in-law David worked on getting the columns fitted for dry wall while my Aunt Kristi and sister Hillary and I started laying flooring in the dining room. The columns were a bugger! When installed they shimmed each side differently and used multiple widths of drywall on each side. No to sides were the same width out from the studs. It took the guys all day to jut get the spacing right on all sides so that the columns would be squared off, or as close to square as possible.

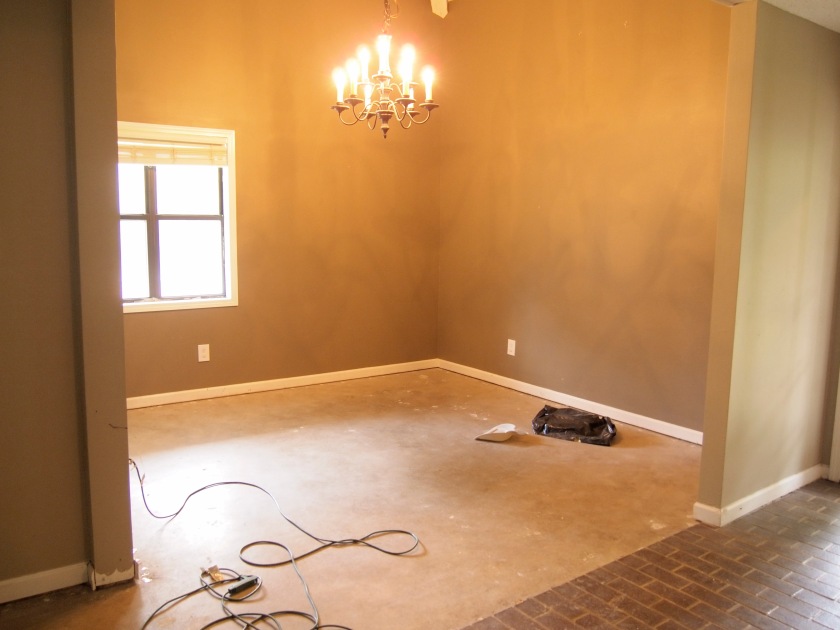
Closer look at dining room before flooring.

The evil columns…

P sporting my late Grandfather’s tool belt. Recently my grandmother sold her house and we inherited all her tools. She had been fixing her house up for the past 12 years and had just about every tool we would need. I can’t even begin to tell you how much money we saved not having to purchase tools. And we got a pretty awesome tool collection out of it. 🙂

The dining room and hallway freshly floored! We used tongue and groove flooring that required gluing down to the actual concrete. The glue we used also acts as a moisture barrier so you have to lay it on really thick and trowel it just right. The glue is kind of a beast. Ok, no holding back, it was a demon. It was really hard to spread the glue since it was so thick and it got everywhere! We wore gloves and we were still covered in the glue by the end of the night. It also got residue all on the top of the wood from it being on our gloves. We were using latex gloves and I think we went through 100 pair just in this area. Even with throwing away a pair when you got glue on them we still managed to get the glue everywhere. As we worked we wiped the glue off, as told by the people at the flooring store.

Little did we know that by wiping the glue off with towels and water we were actually leaving behind a fine residue that would not make itself known till later. It would take over 18 hours of scrubbing the floors on our hands and knees to get the residue completely off.

Helpful hints for putting in hardwood flooring that you glue down:

1. If you get glue on the wood, leave it. Let it dry and then come back the very next day and use industrial adhesive remover and a credit card to get it off. By letting the glue dry on you will be able to get all the glue off and you won’t have to worry about residue.

2. If you do have residue streaks on the wood nothing will get it off except Magic Erasers. We tried literally everything the stores had for getting residue off and nothing worked but the Magic Erasers. Since the flooring had been sealed with an acrylic finish the Erasers were safe to use on them. We tested a left over piece of wood and let it sit for a couple hours before we used the M.E. on the whole floor. We had been scrubbing for days with all the other chemicals and were getting terrible headaches from the fumes. Magic Erasers got the residue off with minimal scrubbing and had no fumes! We made sure to wipe the area with a damp rag and then go over it with a dry rag right after we use the M.E. on the wood. We wanted to make sure no chemical was left on the surface of the wood.  For days I thought we had ruined our floors with the residue and when they finally came clean I cried tears of joy. No really, I cried.

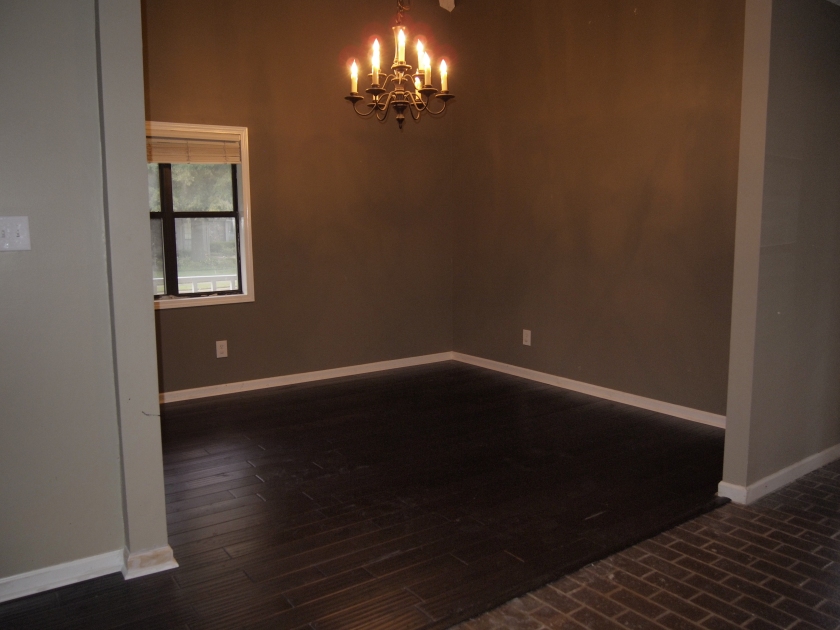
We picked a hand scraped birch in 3 3/8 inch planks. I really love the texture of the wood! Side note, birch is a pretty soft wood and can easily be scratched. I’ve already put a good scratch in the flooring from scooting a box across it and it having a little rock under it… if you have young kids, probably not the best wood for you.

Philip trimming out the coulmns with baseboard. For thresholds we decided to purchase bare t-molding and stain it ourselves to match the wood. Two reasons for doing this. 1. They did not have the t-molding we needed in stock and it was going to take about 2 weeks to get in. 2. T-molding that is prestained to match your wood cost double that of unfinished wood. We saved several hundred dollars staining it ourselves. We were able to match it perfectly and you would never know we stained and sealed it ourselves.

Finished dining room!

Finished living room! Look closely and you can see the residue streaks… This was before our hours of scrubbing…


Amydog approves!

Huge warning! I got the flooring glue all over me when putting down the floors. In order to get it off your skin you have to use Mineral Spirits. I let the Mineral Spirits rest on my skin for to long and got 2nd degree chemical burns on both my legs. Chemical burns are not fun!!! Please take caution and wear long pants, gloves, and long sleeve shirts when working with this glue. It is a monster and gets everywhere. Three weeks later and we are STILL finding it on our skin. The second day we worked on the floors I suited up in a full jumpsuit to prevent glue exposure. I’m not kidding, it is ridiculous!

A before and after of the dining room.

And a before and after of the living room. Amazing how much more space we got with taking out that half wall!

Savannah

The Kitchen: After

after, Before, kitchen, Uncategorized

Oh the glory of nearly finishing a project! I wold say that the kitchen is about 85% finished. Tuesday we hung the new pantry door (a task that took way to long because we couldn’t find our router in the mess that is our tool storage area… and the hinges area didn’t come precut…) and it needs a coat of paint as well as the laundry room doors. The new cabinet doors should be build and installed within the next couple months but other than those small things, this room is done!

Since we have all white dishes and good bit of our serving pieces and baking bowls are glass or white we will be leaving the above set of cabinets open as a display cabinet. I really like the idea of having some open cabinets but I don’t like clutter or things that don’t match. All the other cabinets hold at least one or two pieces that stick out a little and so doors are going up 🙂 The OCD side of me needs order and uniformity.

A look at the bottom cabinets and the new dishwasher. Please ignore the smudges on the stainless… still trying to figure out how to clean that properly. Any suggestions blog world?

This is about as much as I can handle on my counter tops… and that is pushing the limits. But I ran out of cabinet space.

If you remember from my inspiration images, I wanted a large sink and oversize faucet. We got it and we didn’t even have to install it. Score! The breakfast area will be home to this table set from our old place. We are thinking of painting the legs white so that that dark wood top is more of the emphasis. I’m not a fan of the black so I’m sure the legs will be painted some color at some point.

The area above the microwave some how got missed during painting… and we have been busy working on other projects to break out the paint in here. It will get painted when I attack the pantry door this weekend 🙂 Look no more nasty old fridge!!

My OCDness in pantry form. Eventually I want to get rid of all boxes and get the cans a bit more organized, but I’ve been busy putting in floors, painting, and running a business to get to organizing cans. Whatever, there has to be a line somewhere 🙂

And the full kitchen as it is right now. So much better!

Here is a little look at before and after to see how far it really has come:

And that my friends is our little kitchen. It was a journey to get it all white but we love how it turned out! We’ll be sure to post when we get the new cabinet door fronts on.

Savannah and Philip

The Kitchen: The room full of surprises

after, kitchen

And time to get into the interior work. Holy cow looking back on these images really shows me how far the house has come. When you are living in a remodel it seems like you haven’t done anything at all. You tend to forget what it was like before you started pouring your blood, sweat, and tears into the house. And believe me, plenty of blood, sweat, and tears have been shed so far (don’t worry, we’ve sanitized where we have shed blood).

As soon as our bid was accepted for the house we started a game plan for the renovations. Ok renovations might be a strong word for what we are doing. I like to think we are being filmed for This Old House and turning a dump into an amazing place. Truth be told our place just needed a little love and not a whole lot of love like most the homes on This Old House. Side note, since we have been married we have spent our free Saturday mornings watching This Old House. We absolutely love that show and it was a huge inspiration to us in this adventure. We both grew up watching it with our parents and we neither of us appreciated it until we were married. 🙂 Back to my original point. We both agreed that we had certain things that we wanted done on the house before we moved in. For me one of the must haves before move in was the kitchen needed to be redone. We took about 2 weeks of solidly working on the house before moving in and it took every spare moment we had to get started on our projects. And we shot a wedding in the middle of that…

I am so glad that we went ahead and got a huge jump start on the kitchen because this room was full of surprises. When I say surprises I mean one things, lots of extra work. 😦

We knew for sure that the kitchen would be ALL white. And by white I mean Brilliant White. As white as white can get on the Pantone chart. Everything but the tile and counter tops were going to get covered in white. And this made me very happy. If I had my way the entire house would be white but P likes some color so no all white house…

The day that we started on the kitchen we were blessed to have Philip’s parents helpings us out. Philip and his dad started on the wall painting and his mom and I started cleaning the cabinets and prepping them for paint. I knew that we needed to sand the cabinets before painting but I thought it would be a quick little chore… But we have learned that nothing is quick in this house.

The cabinet drawers got pulled out and look what we found:

Yep lime contact paper. We thought it was paint and then we tried to sand it… Nope 1980s contact paper that was nearly impossible to get off. You would get a little bit coming off and then it would snap because it was so old and brittle. I got a nasty bruise on my arm from pulling this stuff and it snapping with me pulling full force. Bless my mother-in-law’s (Cindy)  heart! She was such a great sport about helping with this stuff. It nearly had me in tears.

More of the evil green and the nastiness that was the pantry. Boy it was so gross!

P and Doug painting. I think P started to hate our choice of white after the 3rd coat of paint and we were still seeing the original green…

Close ups on the cabinets before attempting to start sanding. They were a funky cream and covered in other people’s grime. I’m not a fan of gunk on my cabinets, especially when I am not sure what the gunk is, so a good sanding was in order.

And then I started sanding… and the paint started falling off in chunks. Not what you want to see when you are planning on doing a light sanding to just get the surface rough to accept the paint.

So I had to go down to bare wood… 😦 not an easy task nor a short task.  The heat gun and electric sander became my best friend on this project.

Come to find out there were 6 coats of paint on the cabinets. Yep 6 different colors. When you are going to paint cabinets that were originally stained and sealed, you need to sand the wood or strip off the sealer and prep the wood for painting so that the wood accepts the paint. Take a wild guess as so what they didn’t do before putting 6 coats of paint on these cabinets… yep they were never sanded. So that was why the paint was peeling off. BOO! People come on don’t cut corners! It will make the next owners’ lives miserable 🙂

Remember that green contact paper… yep I found more of it in the cabinets! They had painted over it! So more ripping up contact paper. Moral or the story, never ever use stick on contact paper. It is from the devil. The end. Oh yeah forgot to mention that it was on the pantry shelves too! What we thought was blue paint on the shelves, nope contact paper. And under the bright blue paper, more green!! I think the lady found a huge stock pile of it on sale some where and decided to cover the whole kitchen in it. I hate that stuff!

The drawers with one coat of paint and a section of the cabinets down to the bare wood, properly prepared for painting.

Friend Whitney and my sister and mom helping with the kitchen.

Painting the insides of the cabinets. These suckers were really deep and it was really hard to get the backs. We were really technical and laid down on our backs with legs flying in the air to get the furthest part.

Putting cabinet doors back on. The old doors got sanded and painted in the white (high gloss) and are going back up for the time being. We are having custom door fronts built in the near future and I cannot to wait to get rid of these. They are really bulky and most of them don’t close properly… in due time.

When we took the old microwave down we found evident of some of the old paint colors 🙂 See that nice shiny wood… yeah it shouldn’t be that way if you are painging it. Sorry I’m still bitter that they didn’t properly prep the cabinets… What can I expect though, we did buy a foreclosure that needed lots of work… 🙂

P installing the new dishwasher. We got all new appliance for the kitchen and I am so thrilled! We have never had matching appliances and it is so nice to have new things in our little fixer upper. 🙂 Bonus we bought them Memorial Day weekend and people we got a killer deal on the whole set! Basically what we would have paid for just the fridge and microwave we got all four during the sale. SCORE! And we got all stainless. Pretty and something that doesn’t need work! Can I get an amen! And the other image is the cabinets all painted and stored open for a couple days so that the high gloss could properly cure and the paint wouldn’t stick or peel off when the cabinets closed. High gloss needs lots of time setting without contact and I am so glad we took the time to leave everything open and let it set.


A much cleaner and fresher pantry! The door got replaced and a new paneled door is in place of the flat old door.

A little out of order but I had to include this of P sanding. He wasn’t planning on working on the house this day and he was in his suit for playing for our church services. I love is make shift work clothes 🙂

The old microwave. Doesn’t look bad but I love that the new one matches everything else.

More cabinets after being painted.

P painting the laundry closet

And a much brighter cleaner kitchen!! This was before the appliances got installed. The full after is coming in the next post 🙂

And a before and after 🙂

Doesn’t look like we did much but boy did we! It took so much work just to get everything white. But we love it and now it is done and we can actually cook and eat like normal people 🙂

Cheers,

Savannah

Inspiration

Uncategorized

Before we get into our interior remodeling I wanted to share a little of the inspiration that we pulled from for the house. As we were looking for a house the websites Houzz.com and Pinterest became my best friend. Some get overwhelmed with these sites and get lost in all all offers or get serious house envy. For me it was a great way of showing us what we wanted in a house and what we really did NOT want in a house. I was pretty surprised at things that I learned that I liked and then I was surprised by things I thought I wanted but when I saw them in multiple homes I quickly realized I didn’t want those things. So here is a little look at what inspired us in looking for a home and also in the remodeling of The Square House. I’ll try and give credit for the images where possible, some images I couldn’t find the original source. I’ll also talk a little about each image and what we loved about it and how it inspired us. Skip my narrative if you want 🙂

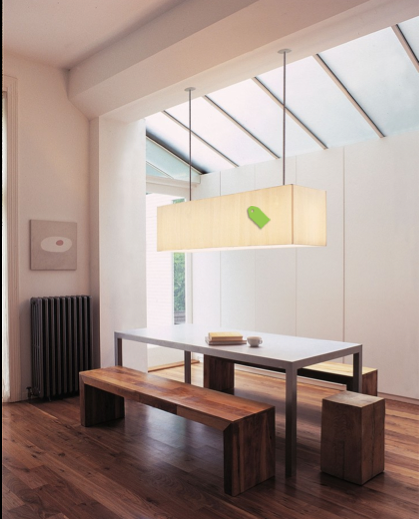
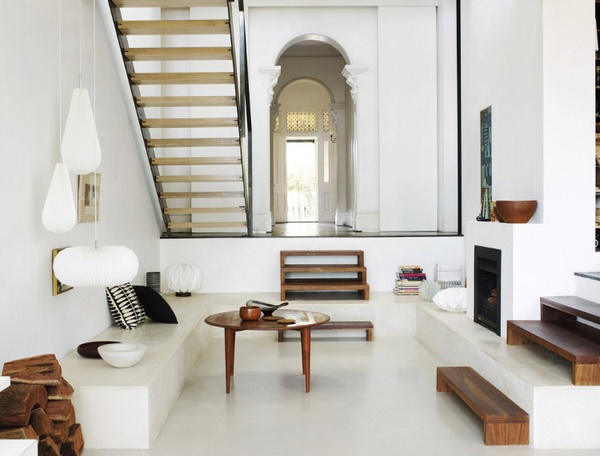
Inspiration- All white, open floor plan, and use of farmtable. I love the mixture of modern and rustic and also the vaulted ceilings.

Source: Houzz.com

Inspiration- Simplictiy. For our bedroom I really wanted to take it back to my love of simplicity within rooms. We eventually will be building a platform bed frame like this one. Also our room will only have a bed and the end tables. Nothing else.

Source: Houzz.com

Inspiration- White walls, painted brick, simple lines with furniture.

Source: Houzz.com

Inspiration- Wall color, using art work as a main focus in the room, basing color scheme from art work.

Source: Houzz.com

Inspiration- Clean, modern lines; farm like table, simplicity.

Source: Houzz.com

Inspiration- Dressing up a farm table with benches. We finally have room for the farm table that I built for Philip’s 26th birthday party (the one where I cooked 7 course for 10 people…) and I am really excited to be able to use it in our formal dining area.

Source: Houzz.com

Inspiration- simple benches for farm table, simplicity of dining room, wall color.

Source: Houzz.com

Inspiration- Large art piece in dining area, simplicity, wall color

Source: Houzz.com

Inspiration- clean lines in room, lighting, and chairs

Source: Houzz.com

Inspiration- Outdoor access from bedroom. We just happened to get a balcony off our bedroom. I plan on making a garden like area on the balcony so that we can have a mini garden to wake up to.

Source: 4inspireddesign.com

Inspiration- modern garden, clean lines for the outdoors, and mixture of concrete with greenery. We plan to take the wild jungle on the side of the house and turn it into a Zen garden area similar to this.

Source: Remodelista.com

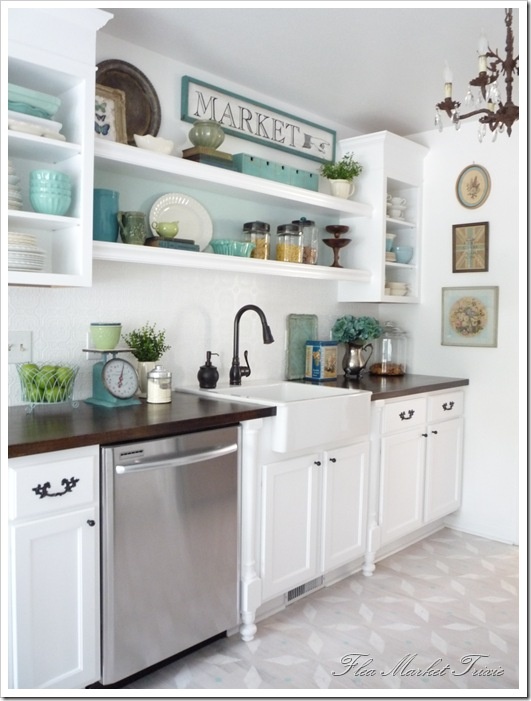
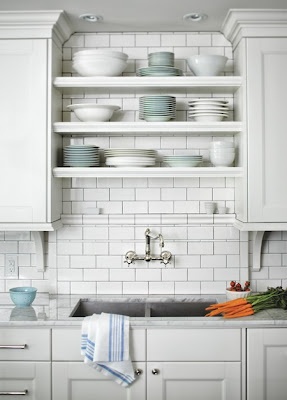
Inspiration- white cabinets, large kitchen sink, open shelving, dark counters. We got lucky and the previous owner installed dark granite counters and a huge stainless farm sink with a gorgeous faucet. Ha who knew that a faucet could be gorgeous. 🙂

Source: Theinspiredroom.com

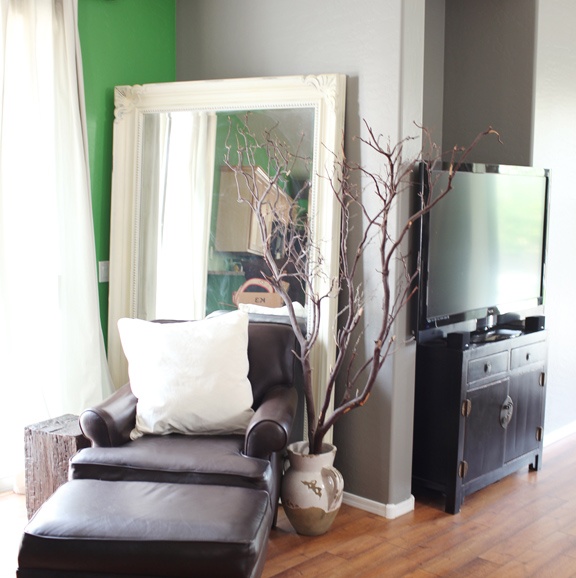
Inspiration- wall color.

Source: Promisetangeman.com

Inspiration- open floor plan, wall color, benches for farm table, mix of modern and rustic.

Source: Houzz.com

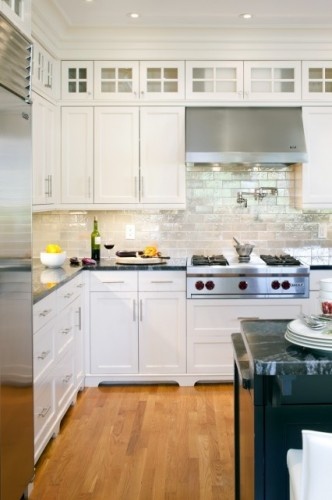
Inspiration- cabinet style and stainless appliances

Source: Houzz.com

Inspiration- All white room, wood accents, simple yet chic.

Source: Desiretoinspire.com

Inspiration- tall ceilings, white with wood.

Source: Blog-alicelanehome.com

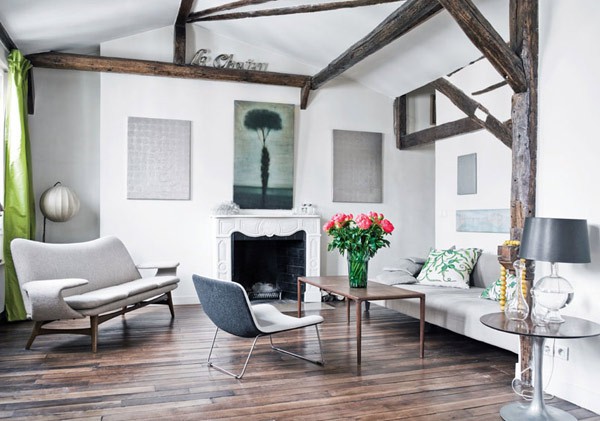
Inspiration- Probably one of my favorite rooms. Love the wall color, furniture choice, mixture of modern and rustic done well, and the chicness.

Source: blog-2modern.com

Inspiration- lantern on farm table and room layout

Source: apartmenttherapy.com

inspiration- all white kitchen, sink, open and covered cabinets.

Source: aapitman.blogspot.com

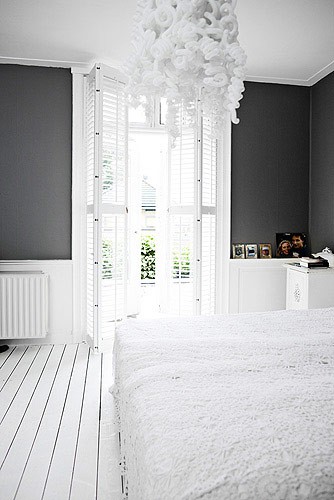
Inspiration- wall color, simplicity, window coverings

Source: unknown

Inspiration- And last but not least wood choice. We knew (well eventually knew) that we would be putting in hardwood flooring. We kept coming back to this dark wood with plenty of texture and wood grain showing.

Source: Home Depot.

So there is a little look at what inspired us in picking our house and in how we remodeled the Square House. Next up will be a look at how some of our interior projects are coming.

Cheers,
Savannah

Progress!!!

after, exterior, Uncategorized

Phew! What a crazy month it has been! As of yesterday we have own the Square House for three weeks and we have been working non stop on it since the day we closed. Actually we have technically been working on it for over 5 weeks. When we were in the closing process we were given a list of about 12 things that needed to be done to the house before the loan would close. Since we were purchasing a foreclosure anything that the bank appraiser wanted done before closing became our responsibility to take care of. So we had to invest time and money into the house before it even became ours and there was still the possibility that something could happen before closing and we not get the house. Needless to say it was a very stressful week when we found out what needed to be done before closing and the time frame in which we had to get it finished.

One of the good things about the appraiser’s list is that is was all stuff that we were aware of, had planned on doing, and had budgeted for in the remodel budget. The only down fall was that we had about 4 days to get it all done. Legally we were not allowed inside the house until we closed so we had to hire a contractor to do the inside items. We were a little peeved about this since we were able to do all the repairs ourselves and I have a really hard time paying someone when I can do it myself. BUT the contractor we hired did a fabulous job and got it all done in time for our loan to process through on time so it all worked out in the end.

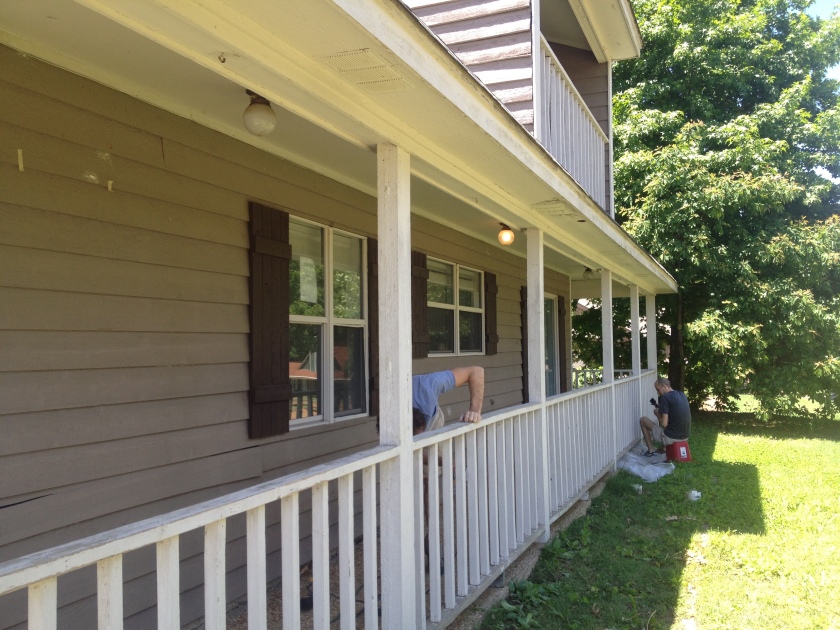
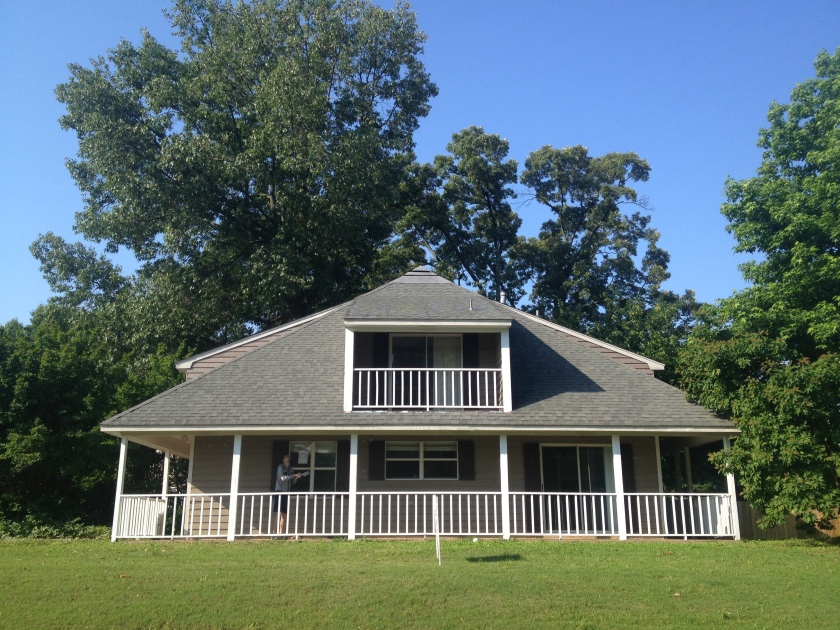
We were “allowed” to do repairs to the outside and the biggest repair was an outside project so it worked to our advantage. We were told that any area on the outside wood that had exposed bare wood would need to be stripped, sanded and painted before closing. Might not seem like a big deal… but remember the wrap around porch that we loved:

Yep all that wood had chipping paint and therefore had to be take care of. The process looked something like this:

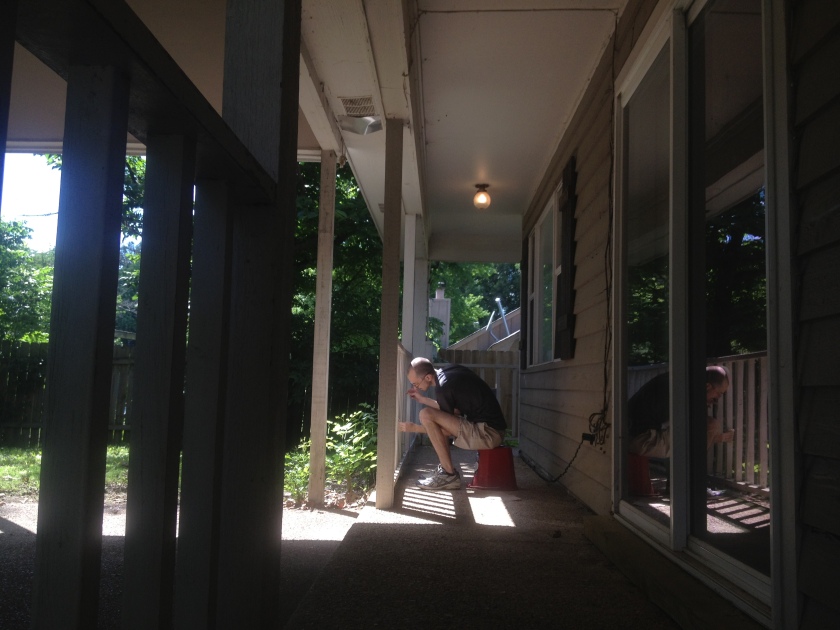
So for two days we scrapped and sanded ALL of the porch. By the way, there are 396 balusters in all of that railing. Ever sanded a baluster while it is in the framing… yep not fun. We were so blessed to have a wonderful friend, Ben, come over on his day off and help us scrap and sand. He was a life saver!!

Here is a look at some of the railing post sanding. On part of it the paint came right off and made it really easy. Other parts were stubborn and needed lots of elbow grease. Since there was so much railing we decided that we were going to do the process right so that we wouldn’t have to do it again for several years.

Day three was the painting day and our family came to the rescue! My mom, two sisters, and Philip’s parents all came and helped us paint the heck out of the railing. In one day we got it all painted!!

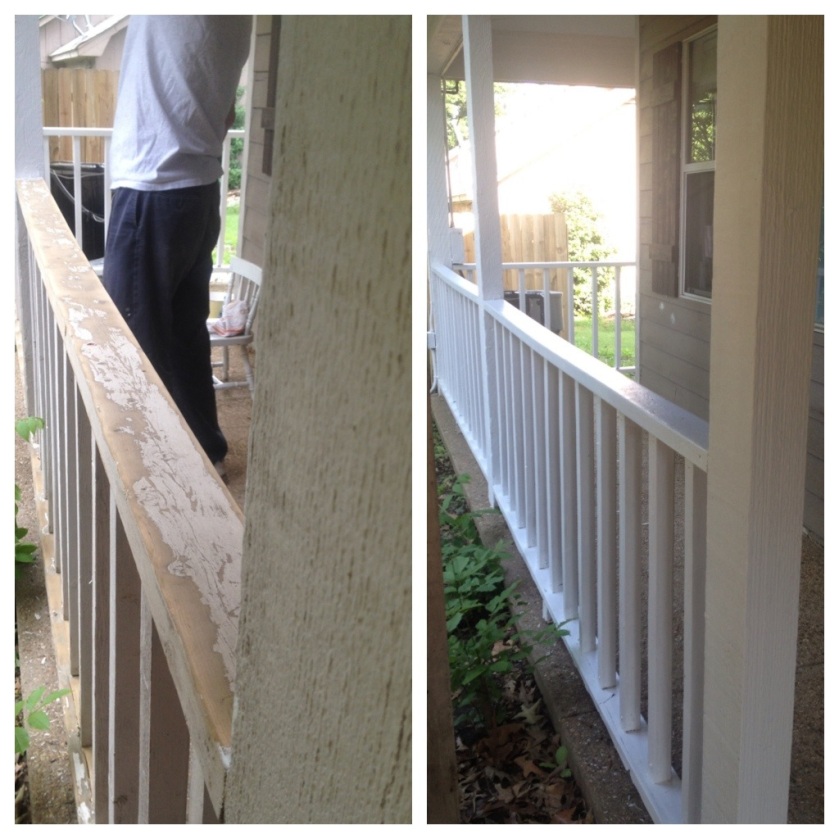
Take a look at the difference!

The whole house looked so much better with just the railing painted! We were thrilled with the outcome. We knew that we were going to paint the porch a brighter white (it was previously a very very creamy off white) and boy are we glad that it is already taken care of! We were beyond blessed to have amazing weather the three days we were doing the work. Memphis summers are pretty brutal and the beginning of this summer it looked like we were going to have killer high temperatures. But in the middle of May when it is typically already in the high 80s it was a low 70 with a great breeze. Had we had the super warm temperatures and humidity that we normally have I don’t think we would have been able to get as much done as we did.

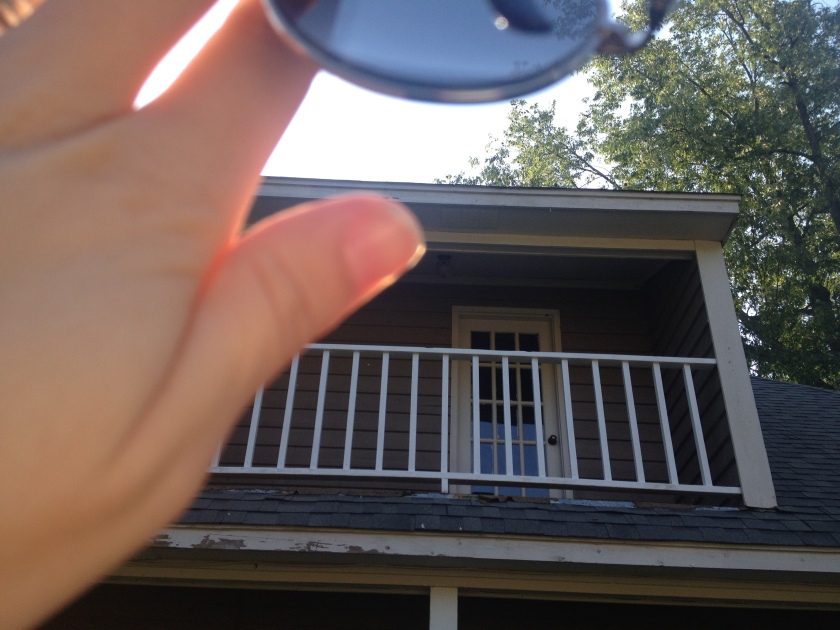
One of the other items that we had to take care of before closing was the carpenter bee issue. Since the house sat vacant for a little while the carpenter bees invaded and did a good bit of damage to some of the trim, fascia boards, and a few pieces of siding. We were required to get rid of the bees, patch their holes, and paint over the patched areas. The only good part about carpenter bees is that they don’t do near as much damage as termites. They bore into the wood and make tunnels for housing but they don’t eat all the wood. So even through we had a lot of bee tunnels all the wood was still good and not rotting. A huge plus! So we caulked all the hole and then had to paint all the trim. The below image is a good look a the railing painted but the trim boards not painted (ignore my hand blocking the sun). Since we went with a brighter white the railing really stood out from the trim and looked pretty funky. So having to paint the trim because of the bee damage actually worked to our advantage cause it got us to match everything all at once.

A closer look at some of the bee damage that had been caulked in. Almost ever piece of trim had some sort of bee hole. If you ever see any signs of carpenter bees, kill them immediately!! They can do a lot of damage in little time and your don’t want to have to clean up after them!

So glad we went with bright white!!

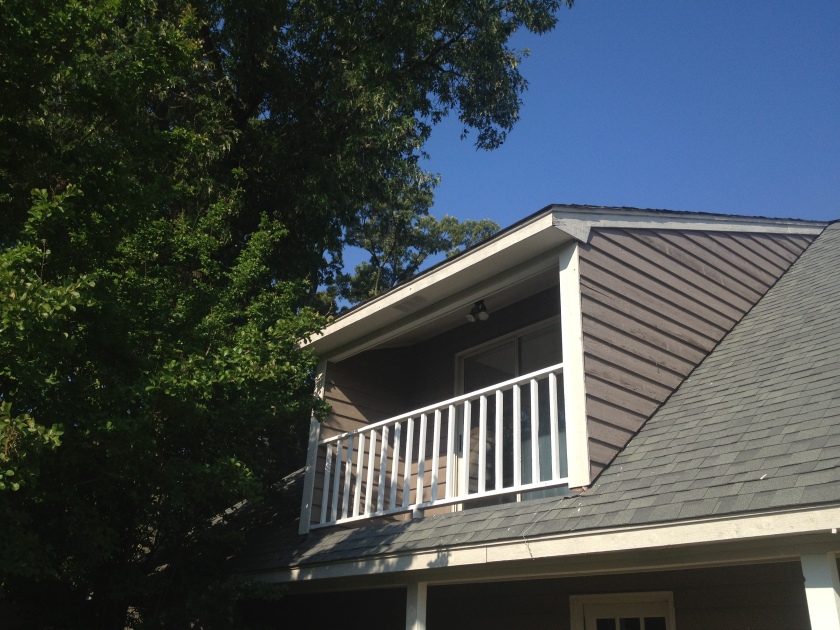
It wasn’t exactly easy to get to the trim on the balconies… we should have used ladders but we hung over the railing instead… Hey it got the job done 🙂

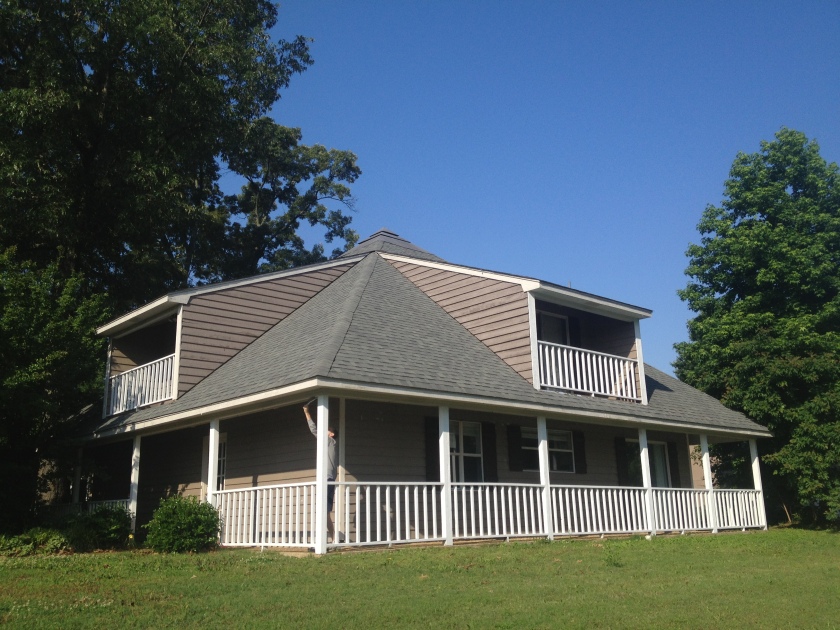
Ta da! A freshly trimmed out house! We are keeping the siding color cause one, we like the color and it is in great shape and two, I am not painting the exterior of this house any time soon. We had cedar wood siding and that stuff is a bugger to cover! It is textured and soaks up paint like crazy. If the exterior ever gets painted, that will definitely hired out!

And here is a look at before and after. Ha i find it humorously ironic that it was cloudy in the image of the before and bright and sun in the after 🙂

Love that the exterior face lift was already done at closing and we were able to throw all our efforts into the interior right away. When our realtor saw all we had done in 4 days she was floored. It made a huge difference to the house and really increased the street appeal of the house. Soon we will be starting the landscaping process and I can’t wait to get some beds in the front of the house. All our neighbors have amazing yards, I’m talking perfectly manicured beds with not a single weed and huge beautiful flowers, and or little house looks so naked without beds. Soon enough 🙂

It is funny to think that we did all that work 5 weeks ago. Actually we have completely about 75% of the interior downstairs remodeling since we moved in. Last Saturday we moved in and we have seen this house take on a whole new feel. We are utterly exhausted from three straight weeks of demolition and remodeling but the changes make all the tiredness worth it! Hopefully in the next few days I will be able to get all the interior changes up 🙂 Until last night we were working 12+ hours on the house, taking Tylenol PM and crashing in bed so this little blog got a little neglected while we did the major changes. But no worries, I documented the process.

Savannah

The journey in the purchase

making a home purchase

When we started the process of looking for a house we had no clue how much work it would take just to get a house once we found what we wanted. We knew that contract signing could be a hassle with bidding and counterbidding but the real hassles came in the form of securing our loan and getting the house approved by the appraiser.

Philip and I have always been cash people. Literally every purchase we have ever made in our 25 years has been with cash (or debit card). When I say everything, I mean it: cars, clothes, furniture, all our photography equipment (that amount alone is the tens of thousands), gas, groceries, trip overseas… you get the idea. Both sets of our parents taught us that if you can’t pay for it, you don’t need it. AKA save until you can afford it. Neither of us had ever had a credit card in our name either. So at the age of 25 we both have college degrees, Philip went through grad school, we have a very profitable business, two cars and we had absolutely zero debit and a large amount in savings. We couldn’t be happier. We had steady income and there was no financial burden over us. BUT with the living off cash method had one major downfall, we also had no credit history. So while we paid all our bills on time (rent, utilities, phone, internet, health insurance, car insurance, butt loads of business insurance, ect) the world does not show us having a traditional credit history. And that my friends is how you show that you are capable of getting a loan… woh woh

Financially we were in amazing shape, better than most American’s these days but because we were responsible with our purchases the banks were saying we didn’t deserve a loan. Heartbreak people, heartbreak. BUT fear not there is hope for those who are like us and have zero credit history! It’s called an nontraditional credit check. Basically it does check your bank records, call those companies that you make regular large payments to, and ask you to prove that you have the funds available for purchasing and continually paying for your home. You end up giving the bank (or lending agent) access to your entire life. No really they ask you give them access to everything under the sun. The paperwork for this type of credit check is pretty intense and at times it gets really ridiculous. Since we are self employed we had to show some pretty intense paperwork for proof of income. Thankfully we keep records of everything (where my OCDness actually paid off, what what ) and we were able to easily give them everything they requested.

Now why do I share all this? Simple, we had no clue that we would spend weeks shoveling out all our information to get a loan that we knew we could pay for. Here are the things I wish we had known about purchasing a house:

1. We live in a credit world. Even if you don’t believe in purchasing things on credit, you need to establish a credit history early so that when it comes time to purchase something as large as a house you can prove you can. Before you turn 21 getting a credit card is easy; they want you in the credit system early! After 21 it becomes increasingly more difficult to get a credit card and start your credit history. Get a card early but be responsible with it. Really and truly if we both had gotten one credit card when we were in college, put one purchase on it a month, and paid it off at the end of the month we would have been in great shape for securing a loan. I’m not an advocate of credit cards but we live in an economy that is credit based and if you want to make a large purchase one day you have to be part of the system.

2. Keep records of everything! Even if it is a digital copy or bills, keep it stored away and organized. Even with traditional credit checks they will need a large amount of info from you. Have it ready cause they will want it.

3. The paperwork is never ending and at times will be ridiculous. Be prepared to send in something at least once a day for a month.

4. The process is stressful, even for the most prepared. Once we had the bid in on our house it was stress city from bid day to closing day, about a month between the two. Even though we were preapproved for our loan, we could possibly lose our loan and interest rate during the full loan application process (this comes after you have a signed contract on a house)

Now on top of the loan journey we had the journey of purchasing a foreclosure. Entering stage right, the government. Here are a few things we learned along the way in purchasing a foreclose:

1. You can get a ton of house for a great price. When a house goes into foreclosure and is then put back on the market you will not be paying market price for the property. We were going to be paying well below market value for our new place and getting more house (square footage) than we thought we could afford.

2. When the appraiser from the bank appraises your house (to make sure the house is worth the amount you are being lent) they will make sure that the house is in a livable condition. Their idea of livable might be different than your idea.

3. When purchasing a foreclosure you are purchasing a property that is being sold as is. When you make a “normal” house purchase, any problems that the appraiser finds with the condition of the house will fall on the home owner. For a foreclosure purchase the buyer (us in this case) is responsible for any repairs the appraiser deems necessary for move in. If repairs are needed you will pay for these repairs before you even take ownership of the house. So in order to get your loan you have to shell out money for repairs..

In our case thankfully our house was in relatively great condition. All work that needed to be done was for the most part cosmetic. The roof was practically brand new, the HVAC systems were in great shape, no major damage to the structure of the house, the foundation was solid, ect. Some foreclosures are in terrible shape and need MAJOR work to them. We were so grateful that the previous owners took care of the property and didn’t let it completely go to shambles.

We were given a list of repairs that needed to be done before we could close on the house but we were very fortunate that we were already aware of the fixes and we had budgeted for those before we put a bid in. We were a little surprise that some of the “fixes” needed to be done before move in but we had to get them done before the bank would give us our loan.

Phew! That was a lot. I hope that in there there is some information that might be helpful to someone who is like us and lives off a cash system. At one point in the process Philip and I both thought that we would not be able to get a loan and would need to spend the next year or two establishing a credit history. Thankfully we talked with our bank and we found out about the nontraditional credit checks and we got around the system because we had a zero history. Had we just had a low credit score rather than a zero one, we would have been in bad shape. At this stage of the economy the housing lending agencies are pretty much only giving out loans to those with good credit history or those that are able to qualify for a nontraditional credit check. Moral of the story, establish a great credit history or save all your pennies and pay for a house fully in cash, you know like they used to do way back in the day when houses cost about as much as one year of salary…

And that’s all she wrote on that subject. Feel free to ask any questions you might have about our journey. We want to be an open book when it comes to making a purchase like this. As we went through this journey we had no clue how hard it would be. We both agreed that people are not open about the process and that can hurt those who have never been there before. Even though this was our first home purchase we learned a ton during this process and hope to help others!


Cheers,

Savannah and Philip